Configure SSL for Weblogic Server :-
In this post I’d like to explain the basic steps to
configure SSL in weblogic Server . If you want some basic idea about SSL and
how it works then please refer to my previous blog on SSL.
Note :- In
this article I am going to cover only 3rd
party CA certificate based SSL configuration not Self Signed certificate
based SSL implementation.
To
set up SSL :-
- Obtain an identity (private key and digital certificates) and trust (certificates of trusted certificate authorities) for WebLogic Server. By default WebLogic managed servers are configured with demo identity and trust information. This should be reconfigured to use real, or self-signed certificates.
- Store the
private keys, digital certificates, and trusted CA certificates. Private
keys and trusted CA certificates are stored in a keystore.
Note: - WebLogic
Server supports private keys and trusted CA certificates stored in files, or in the WebLogic Keystore provider
for the purpose of backward compatibility only.
- Configure the Identity and Trust keystores for WebLogic
Server in the WebLogic Server Administration Console.
- Set SSL attributes for the private key alias and password in
the WebLogic Server Administration Console. Optionally, set attributes
that require the presentation of client certificates (for two-way SSL).
·
Obtain
an Identity (private key and digital certificates) and trust
To use SSL, the server needs a
private key, a digital certificate containing the matching public key, and a
certificate for at least one trusted certificate authority. WebLogic Server
supports private keys, digital certificates, and trusted CA certificates from
the following sources:-
ü The
demonstration digital certificates, private keys, and trusted CA certificates
in the WL_HOME\server\lib directory.
ü Sun
Microsystem's keytool utility can be used to generate a private key, a
self-signed digital certificate for WebLogic Server, and a Certificate Signing
Request (CSR). Submit the CSR to a certificate authority(CA) to obtain a
digital certificate for WebLogic Server.
ü The
Cert Gen utility generates digital certificates and private keys that should be
used only for demonstration or testing purposes and not in a production
environment.( I will cover it in other blogs).
This document contains mainly 2
activities to configure the SSL
1) Keystore/certificate
creation
i)
Keystore/certificate Creation Using JAVA
Keytool
a)
Generate keystore(JKS)
b)
Import root and intermittent certificate.
c)
Generates CSR based on the JKS created.
d)
Submit the request to CA to get server
certificate or public key.
e)
Create PEM(certificate chain) from server
certificate and import the same to JKS.
f)
Create identity and trust keystore .
ii)
Keystore/certificate Creation Using EM Console
a)
Generate keypair
b)
Generates CSR
c)
Submit the request to CA to get server
certificate.
d)
Create PEM(certificate chain) from server
certificate and import the same to keystore.
2) Weblogic
Keystore Configuration using Administration Console
I am going to explain some methods
to generate certificate and create identity and trust store for Weblogic SSL configuration:-
1. Keystore/certificate Creation
Using JAVA Keytool
2. Keystore/certificate Creation Using EM Console
1. Keystore/Certificate Creation Using JAVA Keytool:-
Ø Keytool
is a key and certificate management utility which comes with JDK
Ø Make
sure JAVA executable is added to PATH environment variable
Ø Create
a directory to store your keystores
cd <directory_path_where_you_want_to_store_keystore>
mkdir
mykeystore
Ø Navigate
to DOMAIN_HOME/bin and set domain environment variables.
cd
/<Domain_Path>/bin/
./setDomainEnv.sh
Ø Navigate
to the keystore directory created earlier and execute keytool command to create
a keystore. Provide required passwords when prompted
cd <directory_path_where_you_want_to_store_keystore>/mykeystore/
keytool
-genkeypair -alias <alias_name> -keyalg RSA -keysize 2048 -dname
"CN=mycompany.com, C=GB" -keystore mytestkeystore.jks
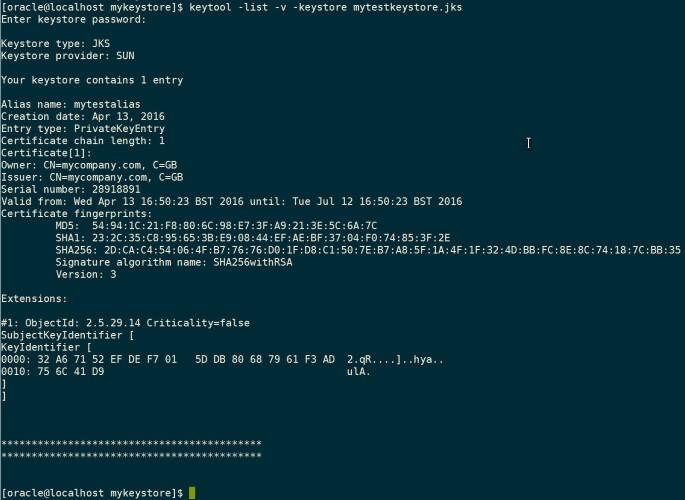
Ø Make
sure mytestkeystore.jks file is created. The details of the keystore can be
viewed using below command
keytool
-list -v -keystore mytestkeystore.jks
Ø Get
the Root and Intermittent certificate from your certificate Authority.
Install
each of the CA certificates as follows, starting with the CA Root certificate
then the intermittent certificate by following this command:
keytool
-import -noprompt -keystore <location of the jks file> -storepass <password
of the jks> -alias "<Alias_name>" –file <location of
downloaded root/Intermittent certificate>
CSR(certificate Signing Request)
Creation Using JAVA Keytool
Ø Make
sure JAVA executable is added to PATH environment variable & domain
environment is set as mentioned in above section
Ø Navigate
to the keystore directory and execute below keytool command to generate CSR.
Once the private key is
generated and the CA certificates are installed, execute the following command
to create CSR
cd
/u01/app/oracle/product/fmw/mykeystore/
keytool
-certreq -v -alias <Alias_name> -file mytestcertreq.csr -keystore
mytestkeystore.jks
Copy the contents of CSR file
and submit it to CA service to get a public key. This is the CSR file generated
Once
you have the public key from the Certificate Authority follow the below
mentioned steps to create a chain of the certificate.
Extract the Intermittent,
root and server certificates from public key file as following the below
mentioned steps :-
Ø Double
click on the certificate in windows system or open it with “crypto shell
extension”
Ø Go
to certification Path and click on the Root certificate and select “View
certificate option”
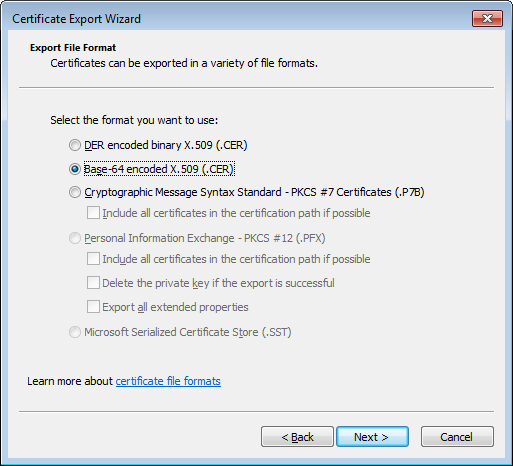
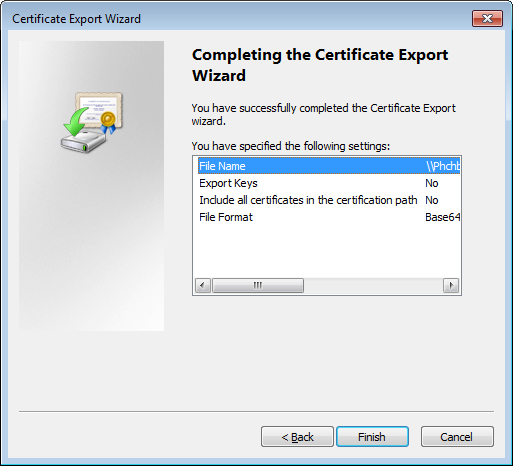
Ø Go
the the Deatils tab now and click on “copy to file” option
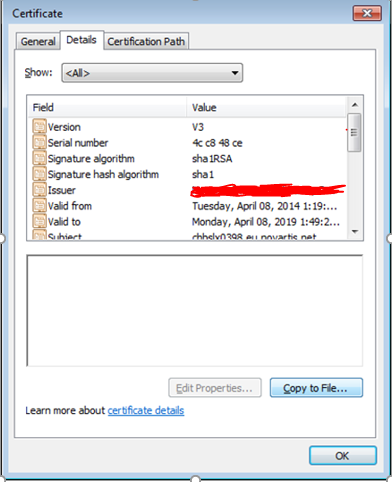
Ø Do
the same for Intermittent Certificate as
well.
Ø Edit
and Copy the content of Intermittent, root and server certificate and paste the
same in a note pad in the below sequence:- serveràsilveràroot
and save the same as server_name.pem
Import Certificate using Java keytool:-
Note:- You can either use one keystore
as trusted and identity store both or have separated one but it is recommended
to have these 2 as a different keystore .
In order to make it different
copy mytestkeystore.jks and save it as mytestkeystore_trusted.jks
Now, run the following command
to create the trust Keystore file . To
create a trust keystore we already imported the extract root CA certificate to
this jks file. Now we are creating identity keystore.
In order to create Identity
store please follow the below mentioned steps:-
Ø Make
sure JAVA executable is added to PATH environment variable & domain
environment is set as mentioned in above section
Ø Navigate
to the keystore directory and execute below keytool command to import Trust
Certificates received from CA
Ø Navigate
to the keystore directory and execute below keytool command to import Server
Signed Certificates chain(.pem file)
Note:- Use
the same Alias of the keypair used while generating the CSR
keytool
-importcert -v -alias mytestalias -file server_signed.pem -keystore mytestkeystore.jks
The above mentioned command
will create identity keystore file which need to place in the server
Now we have identity and trust
keystore and need to configure weblogic.
2. Keystore/certificate Creation Using EM Console( This is another
way to create keystore)
Ø Login
to Fusion Middleware EM Console using below URL and Weblogic administrator
credentials
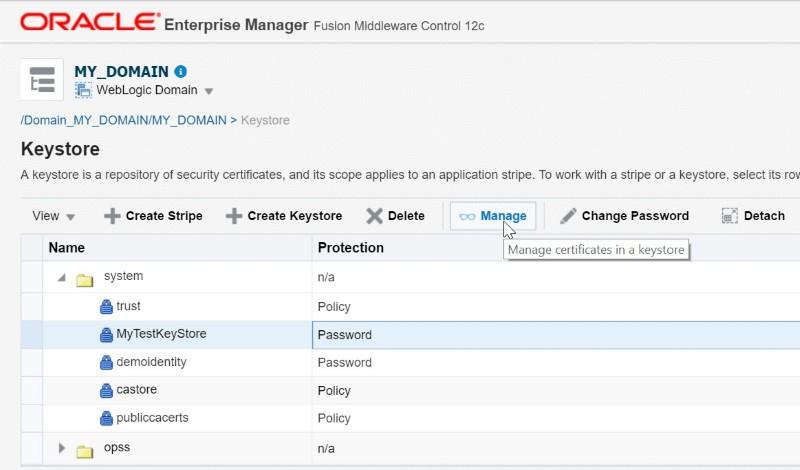
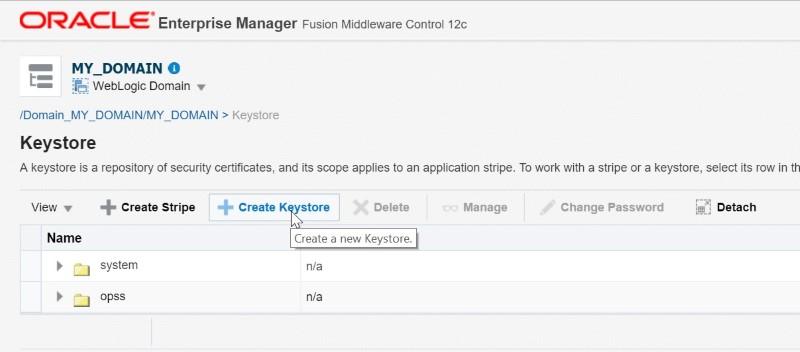
Ø Navigate
to Weblogic Domain -> Security -> Keystore
Ø Click
Create Keystore button
Ø Provide
new Keystore details and click OK
Ø Verify
new Keystore under System stripe
Keypair
& CSR Creation Using EM Console
Ø Select
the new Keystore and click Manage
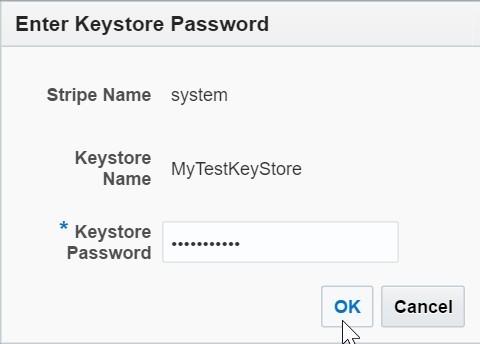
 Ø Provide
Keystore password and click OK
Ø Provide
Keystore password and click OK
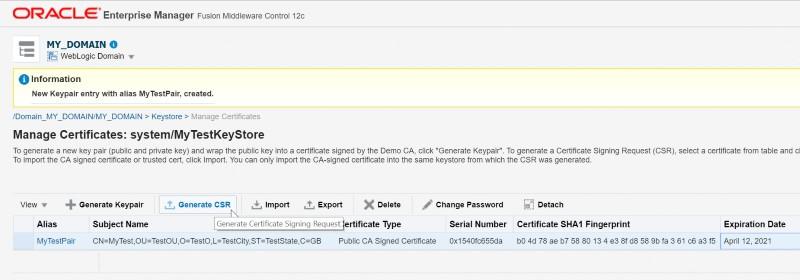
Ø Click
Generate Keypair which creates a public-private keypair
Ø Provide
details for your new keypair and click OK
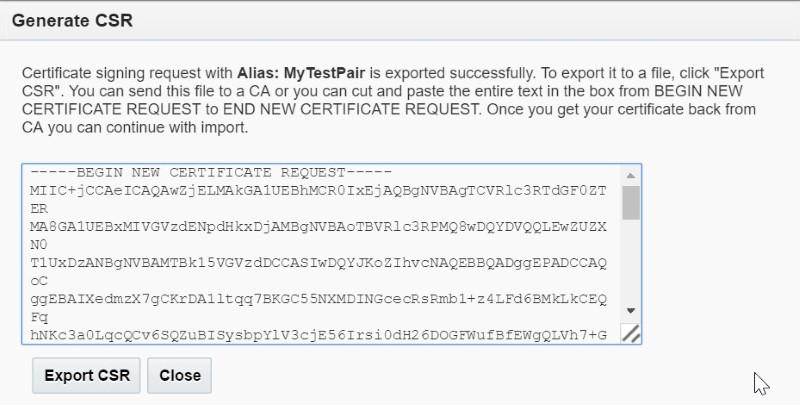
Ø Verify
the new keypair details. Select it and click Generate CSR to generate a
Certificate Signing Request
Ø Provide
password when prompted
Ø Copy
the CSR content or export it to local machine to send it to third party
Certificate Authority who will provide with a digitally signed certificate and
trust certificates
Note :- Now,
create a certificate chain(.pem) as mentioned above in the document during
certificate creation using keytool.
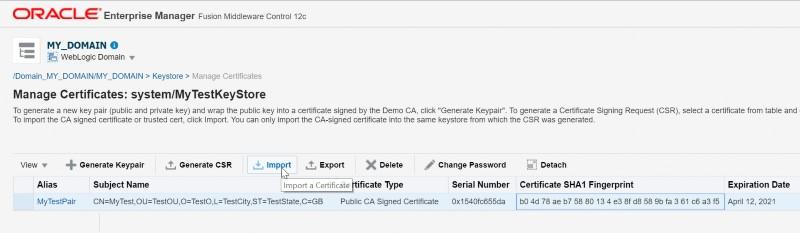
Import Certificates Using EM
Console
Ø Select
alias on click Import on EM Console. Provide Keystore password when prompted
Provide details of the received
certificates and click OK
Ø Select
either Trusted Certificate or Certificate depending on the type of certificate
you are importing
Ø Select
the alias from the drop down. Please select the same alias used while
generating the CSR
Ø Provide
the password for your Keystore
Ø For
Certificate Source, you can either paste the certificate content directly or
select the file received from the CA
Weblogic Keystore Configuration
using Administration Console
Ø Login
to Weblogic Administration Console using below URL and Weblogic Admin
Credentials
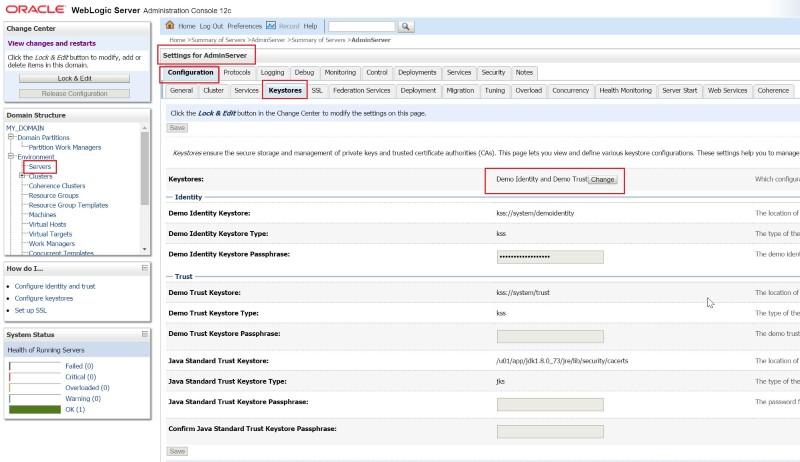
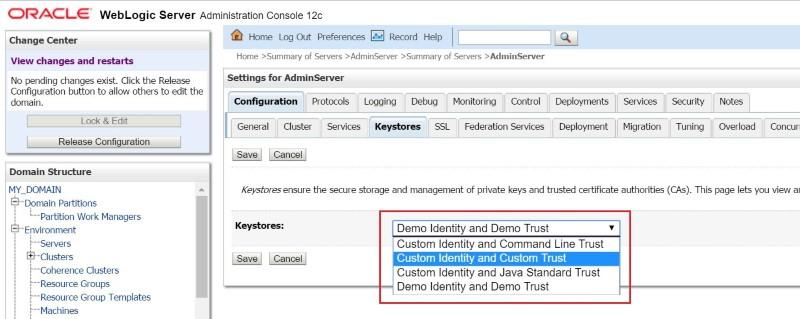
Ø Navigate
to Environment -> Servers -> ServerName -> Configuration ->
Keystores. By default DemoTrust and DemoIdentity stores will be used
Ø Click
on Change button. Select “Custom Identity and Custom Trust” and click Save
Ø Provide
details of the Custom Keystore
For Oracle Keystore Service
(KSS), ie the Keystore created using EM console
Ø Custom
Identity Key Store : kss://system/MyTestKeyStore
Ø Custom
Identity Key Store Type: kss
Ø Custom
Identity Key Store Passphrase : Keystore Password
Ø Confirm
Custom Identity Key Store : Confirm Keystore Password
For JAVA Keystore Service
(JKS), ie the Keystore created using JAVA Keytool
Ø Custom
Identity Key Store : /<path>/mytestkeystore.jks
Ø Custom
Identity Key Store Type: jks
Ø Custom
Identity Key Store Passphrase : Keystore Password
Ø Confirm
Custom Identity Key Store : Confirm Keystore Password
Ø Custom
trust Key Store : <path>/mytestkeystore_trusted.jks
Ø Custom
trust Key Store Type: jks
Ø Custom
Trust Key Store Passphrase : Keystore Password
Ø Confirm
Custom Trust Key Store : Confirm Keystore Password
Ø If
you are using same Keystore for Trust and Identity, provide same details in
both Trust and Identity sections. If you are using different Keystores
(preferred method in production environments), provide respective Keystore
details
Ø Save
and activate the changes. Restart the Managed / Admin server where ever
Keystore changes have been done
Thats all
!! Hope it was helpful. If you have any queries, please post them in comments
section.


